How to beat every 99 Nights enemy: The Deer is countered by flashlight stuns and campfire light. The Owl requires standing completely still. The Ram needs dodge-and-shoot during recovery windows. Cultists die to prioritizing crossbow types first.
Every enemy in this game killed me at least once. Some killed me dozens of times before I figured out their patterns. The Deer alone probably has 50+ of my deaths.
For class recommendations to fight these enemies, check our 99 Nights in the Forest Class Tier List. Need free Diamonds for better gear? Grab our 99 Nights in the Forest Codes.
Enemy Overview
| Enemy | Threat Level | Spawns | Counter |
|---|---|---|---|
| The Deer | Extreme | Every night | Flashlight, campfire |
| The Owl | Extreme | Snow biome nights | Stand still |
| The Ram | Extreme | Random nights | Dodge charges |
| Cultists | High | Waves after Night 10 | Guns, walls |
| Wolves | Medium | Forest, day/night | Melee, avoid |
| Alpha Wolf | High | Forest | Ranged weapons |
| Bears | High | Forest | Avoid or heavy weapons |
| Bunnies | None | Forest | Harmless |
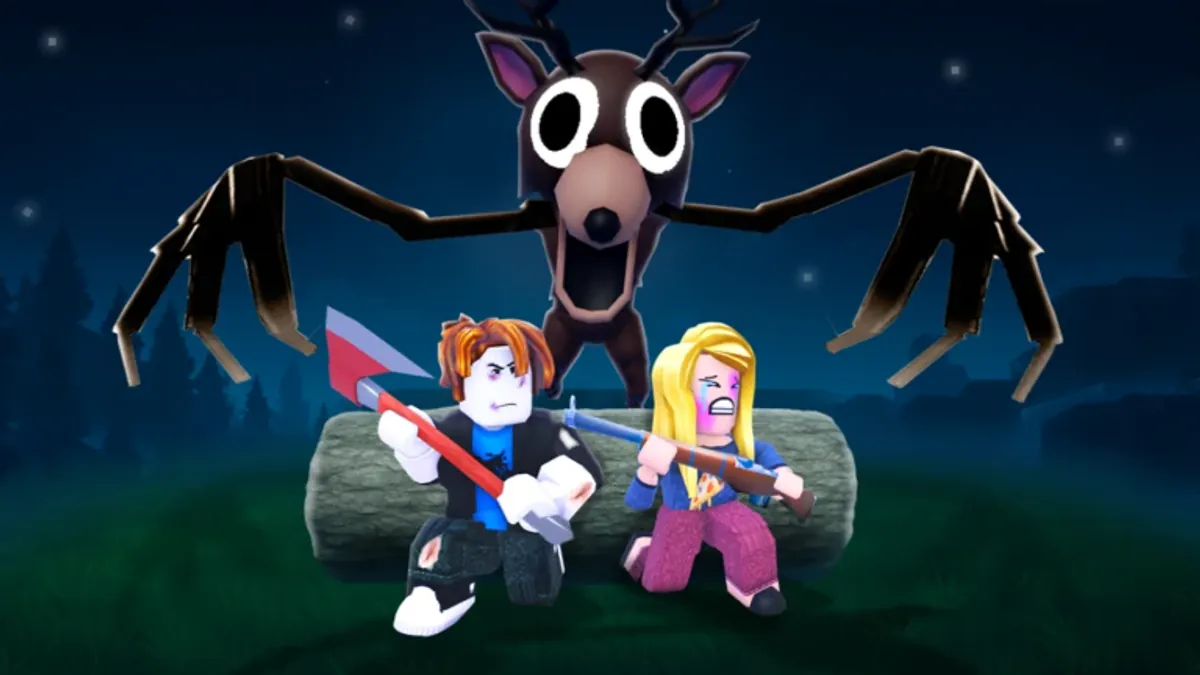
The Deer (Primary Antagonist)
The Deer is the main threat you'll face every single night. This twisted creature hunts players relentlessly from dusk to dawn.
Stats
- HP: Scales with day count
- Damage: 25+ (increases over time)
- Speed: 45 (faster than players)
- Spawn: Forest, every night
Behavior
The Deer activates at nightfall. You'll hear its distinctive sound cue before it appears. It hunts by sight and sound, moving directly toward players.
What makes The Deer terrifying: it's faster than you. You can't outrun it in a straight line. It will catch you.
Weaknesses
Flashlight: Shining your flashlight directly at The Deer stuns it briefly. This buys you 2-3 seconds to run. The stun has a cooldown, so you can't spam it.
Campfire Light: The Deer cannot enter the campfire's light radius. This is your safe zone. If your fire is lit, you're protected.
Walls: The Deer will attack walls but takes time to break through. Multiple wall layers buy you time.
Counter Strategy
Option 1: Camp Defense Stay within your campfire radius. Let The Deer circle your walls. Shoot it from safety. This is the safest approach.
Option 2: Kite and Flash If caught outside, use the flashlight stun, sprint toward camp, repeat. Risky but faster for experienced players.
Option 3: Kill It With good weapons (Cyborg arm cannon, Alien tech), you can actually kill The Deer. It drops valuable loot. This becomes viable around Night 30+ with proper gear.
Common Mistakes
- Letting the campfire go out at night (instant death)
- Exploring the forest after dark without a flashlight
- Trying to outrun it without using the flashlight stun
- Building walls too thin (one layer isn't enough)
I died on Night 5 my first 8 attempts because I didn't understand the campfire mechanic. Don't be me.
The Owl (Secondary Antagonist)
The Owl replaces The Deer on certain nights when the Snow Biome is present. You'll see the message "The Owl has woken up" when it spawns.
Stats
- HP: N/A (immortal in most versions)
- Damage: 25+ (scales with day count)
- Speed: 45 (flight speed)
- Spawn: Snow biome, replaces The Deer
Behavior
The Owl flies above the forest, then swoops down near players. Once landed, it searches for prey by detecting movement.
This is the key: The Owl detects movement, not presence. If you stand completely still, it won't attack.
Weaknesses
Stillness: Stop moving entirely when The Owl lands. Don't turn. Don't walk. Don't even look around. It will eventually fly away.
Campfire: Like The Deer, The Owl avoids the campfire light radius.
Counter Strategy
When you hear The Owl's screech:
- Stop moving immediately
- Wait for it to land
- Stay frozen until it flies away
- Resume activity
The hardest part is fighting your instincts. Every fiber of your being screams "run" when a giant owl lands next to you. Don't. Running triggers aggro and you will die.
Common Mistakes
- Panicking and running when it lands
- Trying to fight it (it's often immortal)
- Moving too soon after it lands
- Ignoring the audio cue
The Ram (Secondary Antagonist)
The Ram is the third major entity. It's a tank that charges through everything.
Stats
- HP: High (more than The Deer)
- Damage: 30+ per charge
- Speed: 50 during charge
- Spawn: Random nights, any biome
Behavior
The Ram charges at players and structures in straight lines. It will destroy walls, traps, and anything in its path. After charging, it has a brief recovery period.
Weaknesses
Recovery Window: After each charge, The Ram pauses. This is your damage window. Unload everything you have.
Predictable Pathing: It charges in straight lines. Sidestep at the last moment to dodge.
Walls (Sacrificial): It will target walls. Use this to control where it charges while you shoot from the side.
Counter Strategy
- Build sacrificial walls away from your main base
- Let The Ram charge the decoy walls
- Shoot it during recovery
- Repeat until dead
The Ram has much more HP than The Deer. Bring extra ammo. Lots of extra ammo.
Common Mistakes
- Trying to tank the charge (you will die)
- Not having backup walls (one charge opens your base)
- Running out of ammo mid-fight
- Fighting it near your campfire (it can destroy it)
Cultists
Cultists attack in waves starting around Night 10. They're the most consistent threat after the main entities.
Types
Melee Cultists
- Rush toward players
- Low HP, easy to kill
- Dangerous in groups
Crossbow Cultists
- Attack from range
- Priority targets
- Can hit you behind walls
Shaman Cultists
- Buff other cultists
- Kill first
- Rare spawn
Counter Strategy
Priority order: Shamans > Crossbow > Melee
Take out ranged threats first. Once crossbow cultists are down, you can safely pick off melee cultists from behind walls.
Speedloading trick: Swap weapons mid-reload to cancel the animation, then swap back. Instant reload. This tech saves lives during waves.
Spike traps: Place them at your entrance. Melee cultists walk right into them.
Wave Scaling
Waves get harder over time:
- Night 10-20: Small groups, mostly melee
- Night 21-40: Mixed groups, crossbow cultists appear
- Night 41-60: Large groups, shamans appear
- Night 61-99: Massive waves, all types
Prepare accordingly. Night 60+ waves can overwhelm unprepared bases.
Wolves
Wolves roam the forest day and night. They're aggressive but manageable.
Stats
- HP: Low
- Damage: 10-15
- Speed: 35
- Spawn: Forest, any time
Behavior
Wolves hunt in packs of 2-4. They'll chase players who get too close. They drop pelts and meat when killed.
Counter Strategy
Early game: Just run. Wolves aren't worth the ammo or health loss.
Mid game: Melee them if you need pelts. Spear works fine.
Late game: Ignore them entirely unless farming.
Common Mistakes
- Wasting ammo on wolves
- Fighting wolf packs without healing items
- Ignoring them when they're between you and camp at night
Alpha Wolf
The Alpha Wolf is a stronger wolf variant. Bigger, meaner, more HP.
Stats
- HP: Medium-high
- Damage: 20-25
- Speed: 40
- Spawn: Forest, rare
Behavior
Alpha Wolves lead packs. They're more aggressive and won't give up the chase easily.
Counter Strategy
Use ranged weapons. The Alpha Wolf hits hard enough that melee is risky. Kite it while shooting.
The drops are better than regular wolves, so it's worth killing if you have the ammo.
Bears
Bears are the strongest regular wildlife. Avoid unless necessary.
Stats
- HP: High
- Damage: 30+
- Speed: 30 (slow but deadly)
- Spawn: Forest, rare
Behavior
Bears are territorial. They won't chase far but hit hard if you enter their space.
Counter Strategy
Best strategy: Avoid entirely. Walk around bear territories.
If you must fight: Ranged weapons only. Keep distance. Don't let it reach you.
Bears aren't worth fighting unless they're blocking something important.
Bunnies
Bunnies are harmless. They're actually useful.
Behavior
Bunnies hop around the forest. They don't attack. They drop meat when killed.
Why They Matter
Free food. Early game, bunnies are easy protein. Chase them down with melee for quick meals.
Enemy Spawn Patterns
Understanding when enemies spawn helps you prepare:
| Time | Enemies Active |
|---|---|
| Day | Wolves, Bears, Bunnies |
| Night | The Deer/Owl/Ram, Wolves |
| Wave Nights | Cultists + Night enemies |
Tip: Build the Sun Dial to track exactly when night falls. Knowing you have 30 seconds vs 3 minutes changes your decisions.
Combat Tips
General Combat
- Headshots matter: Most enemies take bonus headshot damage
- Reload management: Never enter a fight with a half-empty magazine
- Positioning: Fight from behind cover when possible
- Escape routes: Always know where your campfire is
Weapon Recommendations
| Enemy | Best Weapon |
|---|---|
| The Deer | Rifle, Alien Tech |
| The Owl | N/A (don't fight) |
| The Ram | Shotgun, high DPS |
| Cultists | Tactical Shotgun |
| Wolves | Spear, melee |
| Bears | Rifle, keep distance |
Class Synergies
Some classes counter specific enemies better:
- Alien: Night vision makes The Deer trivial
- Necromancer: Cultist waves become minion refills
- Beastmaster: Wolf packs handle most threats
- Assassin: Stealth bypasses everything
Related Content
- 99 Nights in the Forest Codes - Free Diamonds
- 99 Nights in the Forest Guide - Survival basics
- 99 Nights in the Forest Class Tier List - Best classes
- Dead Rails Codes - Zombie survival
- Dandy's World Codes - Horror with Twisteds
Official Resources
Now you know every enemy in the game. The Deer is scary until you understand it. The Owl is terrifying until you learn to stand still. Knowledge is survival.
Good luck out there.